
How to Make Your Own Apple Cider
Homebrewing is growing in popularity as many find it to be the hobby they were looking for. It keeps you busy and productive in a fun way. You get to make your own drink, experiment with new methods and recipes, and there’s nothing better than being able to produce something which you can enjoy with your friends and family.
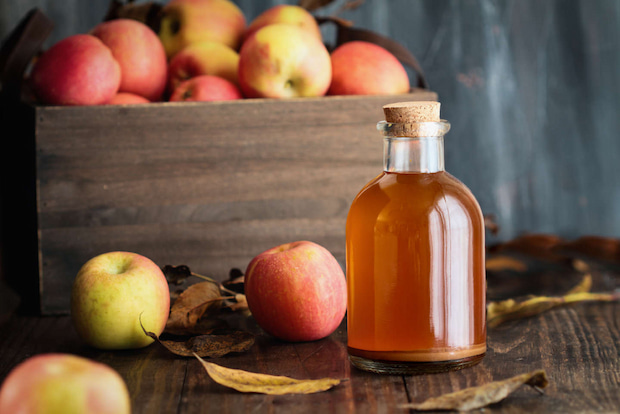
Apple cider can be alcoholic or non-alcoholic and have many different flavours. Many people prefer to make it themselves because it’s the most natural variant and you know everything that you’ve put in there. Moreover, cider is beneficial for your health since it contains antioxidants and vitamin C which help your immune system. It doesn’t contain gluten which is a big plus for those who are sensitive or intolerant. Also, some people use it as a remedy for stomach problems and aches.
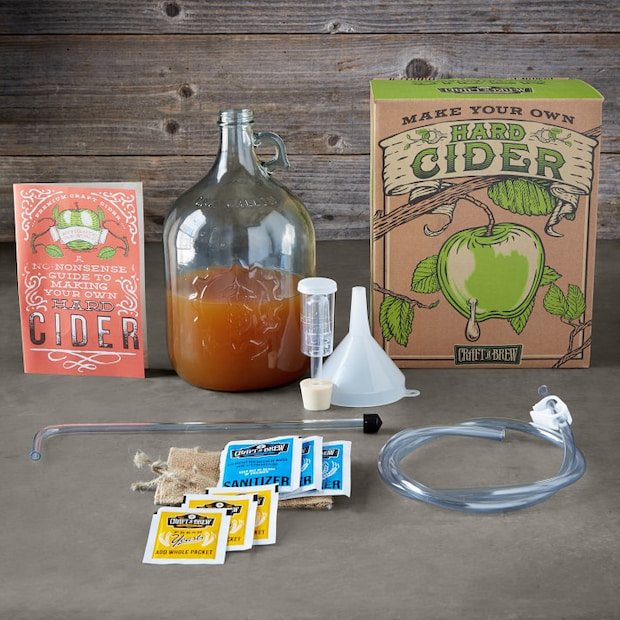
Besides making it from your own apples, there are easier ways to do that by using kits that contain everything you need, like Mangrove Jack’s cider kit.
Using a Kit to Make Your Cider
Mangrove Jack’s pouches are a quick way to make your own cider. They contain all the ingredients you need for a fresh drink. They have concentrate made from high-quality fruit to ensure the best flavour. You can go for the classic Mangrove Jacks apple cider or some of the other varieties.
There is the dual pouch technology as well that has the wet ingredients filled on one and the dry ingredients filled on the other side. The pouches are nitrogen flushed before they’re filled in order to sterilise them. Then, for a superior taste, the pouch is cold filled to retain all the flavours and aromas and there aren’t any artificial colourings or caramels.
When it comes to the flavours, besides the Mangrove Jacks apple cider, you can opt for different fruit mixes, like mixed berry cider, pear, strawberry, raspberry, mango, peach, blueberry, and many others. Just pick your favourite and start brewing.
What Does the Kit Contain and How to Do It?
The starter kit has everything you need – all the equipment and ingredients necessary to make your first cider. Here’s a quick explanation of the steps involved in using the kit.

- Sanitise the equipment – You want to start by thoroughly cleaning and sanitising all the equipment because this can affect the outcome and the taste of the cider. You’ll need a cleaner and sanitiser for cleaning the fermenter, lid, and mixing paddle.
- There are dry and wet pouches for your Mangrove Jack home brew. Set the dry ingredient aside for now and add the wet ingredients from the compartment into the clean fermenter and squeeze everything out. Then, add boiling water (3 L) to the fermenter, dextrose sugar (1 kg), and stir to dissolve it.
- Add cold water up to 23 L and check the temperature. It should be between 18-24 C and if not, put the fermenter in an icy bath.
- Add the Mangrove Jack yeast and sweetener and stir well. If you want a sweet cider, add the whole sweetener. If you want it off-dry, add half the sweetener, and if you want it dry, don’t add the sweetener at all.
- Add the airlock and grommet to the fermenter and secure the lid. In order to protect the brew, the airlock U needs to be half-filled with boiled water.
- If there are dry hops, you’ll need to add them after four days. There are instructions on how to do that. If there aren’t dry hops, it’ll need to ferment for six days or until the airlock has stopped bubbling. You’ll need to check the SG (Specific Gravity) with a hydrometer to know that the fermentation is complete. You can find the table reference online.
- When all of that is over, you can add the Mangrove Jack cider flavour and stir. Leave for 24 hours.
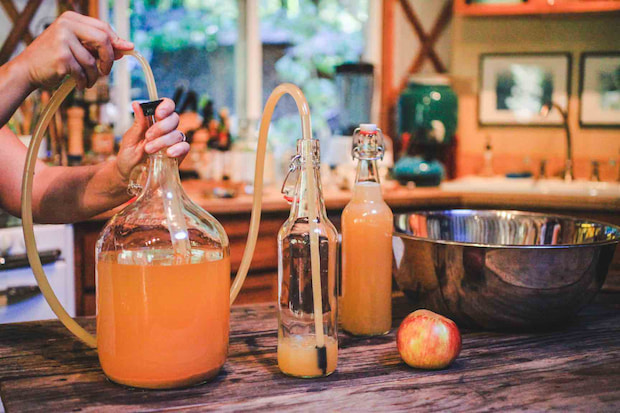
- You’ll need reusable bottles to bottle the cider. Make sure that everything you use is sanitised. Seal and keep the bottles in a warm place for five days and then move them to a cold, dark place for seven days. Your cider is ready to drink when it’s clear.
How to Make Cider with Your Own Apples or Apple Juice?
If you want to go the traditional way and have apples that you need to use, this is the way to go. You can use a store-bought juice, but it needs to be pasteurised in order to ferment.
- Start by cleaning and sanitising everything but don’t use dish soap. There are special cleaners and sanitisers that you can buy separately or together.
- Then, you should mix the juice, yeast, and sugar but if you’re using apples, this will take more time.
- You’ll need to pick the apples, clean and juice them. Attach the hose to the juicer and put the other side to the straining bag which is placed in the straining bucket.
- Place the bucket into the brewing bucket. Place a demijohn under the brewing bucket’s tap to collect the juice.
- Juice the apples and regularly clean the pulp container. You may need to clean the juicer several times as well, depending on how many apples there are. Don’t let pulp into the final juice.
- Mix the yeast with a small amount of fresh juice at room temperature in order to kick-start the fermentation. How much yeast you’ll need depends on the amount of juice you have. Stir it after 30 minutes and pour it into the demijohns. Secure the airlock on top.
- Keep the demijohns in a warm place and usually, after three to four weeks, the cider becomes clear. You’ll need to check with a hydrometer to see whether the fermentation is complete.
- Siphon the cider into sterilised reusable bottles and your cider is ready. For sparkling cider, you can add healthy granulated sugar to the bottles and then fill them with cider.


About Author
emily
?The first draft is just you telling yourself the story. Likes: ❤️Cats ?, Dogs?, Chocolate Icecream ? Dislikes:? White Wine?, Chinese food ? Favorite song: ? Ashlee - Alone With You