
Important Tips on Replacing the Brake Shoe on Your Own
Brake systems are used in all kinds of transportation, be it SUVs, sports cars, trucks and even bicycles. Of course, not every type of vehicle uses the same type of system, but when it comes to cars these are usually drum discs and drum brakes. While the latter is an older system, it still finds good use in today’s vehicles. This is thanks to the brake shoe which is basically a piece of curved metal with friction material on one side. The shoe is what makes the car stop when you put your foot on the brake pedal.
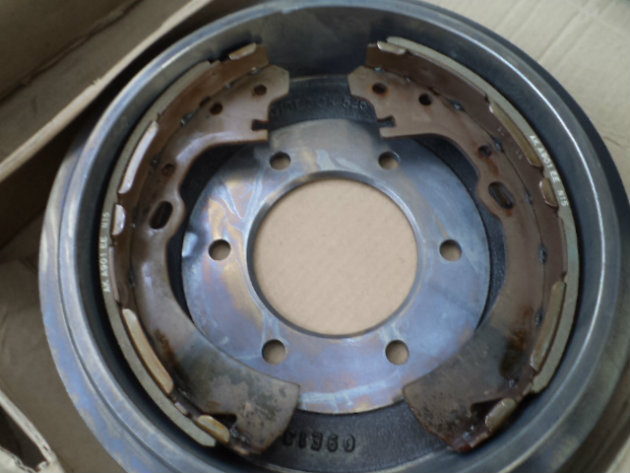
Brake Shoe
The way a car stops is when you press on the pedal and the wheel brake cylinder is engaged and forces the shoes to move away from each other, thus pressing against the brake drum which turns with the wheel. The lining on most shoes is made of synthetic aramid fibres which are very resilient and extremely heat-resistant – this allows brake shoes to deliver more braking force and also makes the drum brake last longer.
Because of this, rear drum brakes generate less heat than a rear disc brake and they are also easier to maintain since they have better corrosion resistance. A brake shoe makes a drum brake require less input force, thanks to their self-energizing effect which makes use of the friction being generated in the braking process in order to multiply the clamping force. A brake shoe can also be remanufactured for future use, which makes drum brakes more cost-efficient – you can also use them together with disc brakes as drums are only used on the rear wheels.
Replacing a Brake Shoe
Like every vehicle component, brake shoes have a certain lifespan too and depending on the type of vehicle you have and where they are placed, it can range between 48,000 km to 160,000 km or even more. It is advised that you check them on every oil change but in case you notice rubbing or squealing noises, reduced braking power, pulling to one side when braking or your parking brake being ineffective it means that it’s time to replace them.
In order to replace a brake shoe, you will need a pair of gloves, a mask, high-temperature grease, brake fluid, brake spring pliers, hold-down remover, drip tray, brake cleaner and brake hardware (you can get a kit with all the hardware). Before you start, make sure your vehicle and brake components have cooled down, which is why you should wait a couple of hours after you are done using your vehicle. After that period has passed, lift the vehicle on jack stands and you are ready to begin.

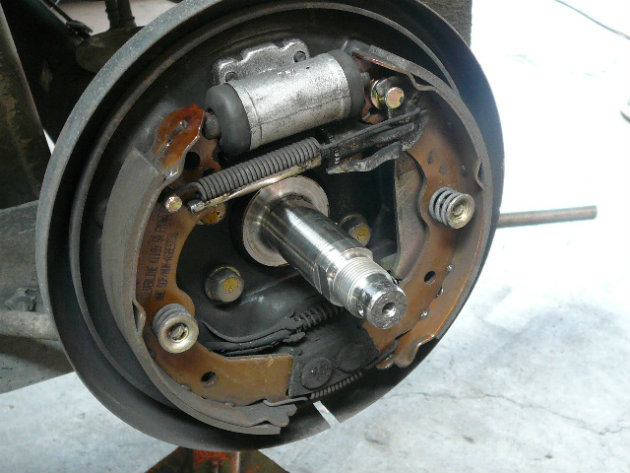
1. Start by removing the brake drum from the assembly and inspect the brake system first as this is where you would spot leaky cylinders and in case you do, it means that they will need to be replaced too. Before you proceed onto the next step take a picture or some notes about the layout of the assembly.
2. After that, put the drip tray under the drum brake, spray it with the brake cleaner and let the solution dry off. Then, remove the top return springs and make sure you leave one set of brakes for later reference. Afterwards, remove the hold-down spring assemblies using the hold-down remover tool. Make sure you stop the retaining post from turning by holding it with your finger from behind. Then remove the shoe return spring using the brake spring pliers.
4. Proceed by removing the assembly that captures the adjuster and then the actual adjuster. Note the direction of the adjuster as you will need to put it back when you’ll be assembling the drum back again. Lightly put some high-temperature grease on the threads, remove the brake shoes from the assembly, and if required, remove the brake cable clip too. You can remove the clip with a screwdriver and put it back again with some pliers.
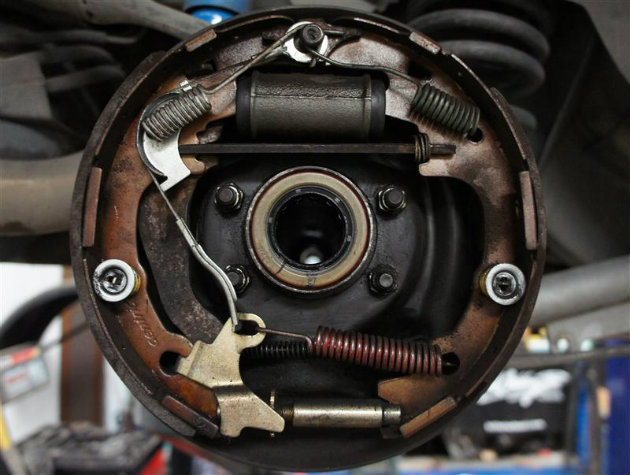
5. When you get to the backing plate, clean it with a brake cleaner and let it dry. Afterwards, apply a thin coat of high-temp grease on the flat spots of the backing plate – this is where it gets in contact with the shoe. Once you’ve removed all the old components, installing the new ones will be done in reverse order. But before you start from the last step or in this case the first, make sure to back down the adjuster so the drum installs more easily and clean the brake shoes one last time before you put them on.
6. When you put the drum back, adjust the brakes by turning both the adjuster star and the drum at the same time. When you hear the shoes contact the drum, that means they are in place. Some older vehicles require you to drive in reverse and hit the brakes in order to adjust them.


About Author
alex
?You can always edit a bad page. You can’t edit a blank page. Likes: ❤️ Beer ?, Pizza ? Dislikes:? Mice?, Barber ? Favorite song: ? Hurts - Wonderful Life